
Our latest Redsence tutorial explains step-by-step how to send emails from a custom email address with Gmail.
When running a business, most business owners continually strive to achieve top quality branding and image, a modern online presence, an engaging social media presence, and much more! As a business owner, getting these aspects of your business up and running are essential. Full customer focus and professionalism in the services that you offer are important to keep in mind when running your business. Ensuring that you have all of these aspects in check will give your business an edge against the other businesses that decide not to do the same!
With that said, it is likely that you operate your business emails and communication with your customers via Gmail. This is great because Gmail is a widely used and accepted email service provider that works across all devices.
We’ve seen way too many times where business owners communicate via their standard “…@gmail.com” email address. This works but is it really professional? Not so much especially when you are communicating with your clients. Wouldn’t it be better if you could send an email from <your name>@<your company>.com? For example, if you have questions you can email our company; Redsence at [email protected] and we can reply to you from the same email!
Luckily, if you have a website domain name this is very simple to change! If you don’t own a domain name yet, learn about buying one by checking out WordPress Website Guide: Everything You Need to Start Building a Modern Website.
Send Emails From a Custom Email Address with Gmail
To get started, you first have to ensure that in your domain provider settings (Google Domains – Recommended provider, Bluehost, GoDaddy, etc.) you set up email forwarding. Meaning, you should configure certain specific email addresses to redirect to your standard email address. For example, in your settings you can configure [email protected] to redirect to [email protected]. With this configuration, if anyone emails you at [email protected], you will still receive all your emails at [email protected].
Now the purpose of this tutorial is to help you also send emails from the custom email address and not just be able to receive emails at the custom address. So this tutorial assumes you have these various custom email addresses configured.
Step 1:
Determine if you have 2-Factor-Authentication (2FA) enabled on your Gmail account. When you login to Gmail, if you have to enter a code that you receive on your phone, then you have 2FA enabled. If you do not have 2FA enabled, then skip to Step 8, otherwise continue to step 2.
Step 2:
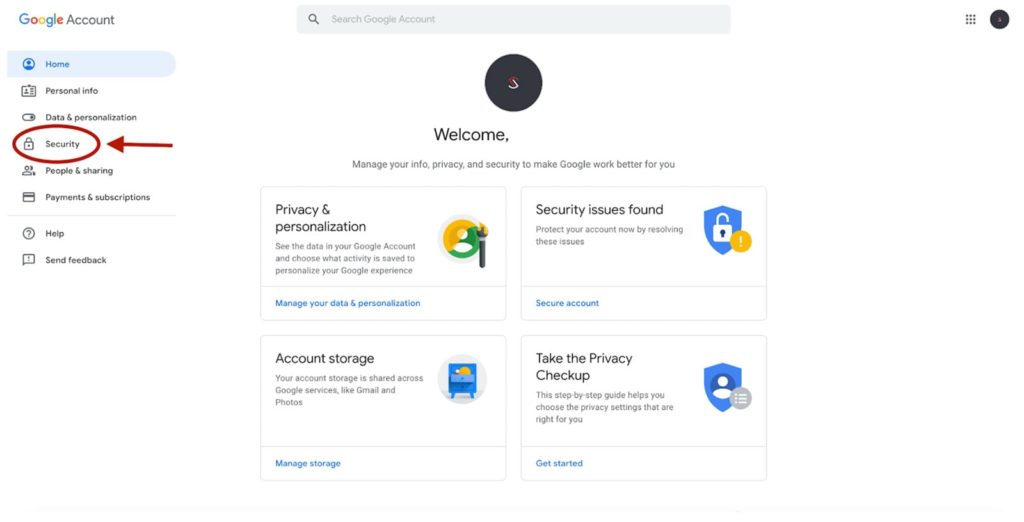
Head over to https://myaccount.google.com/ and sign in like you normally do in your Google account. Once you login you should see the page below. Click on the Security tab on the left.
Step 3:
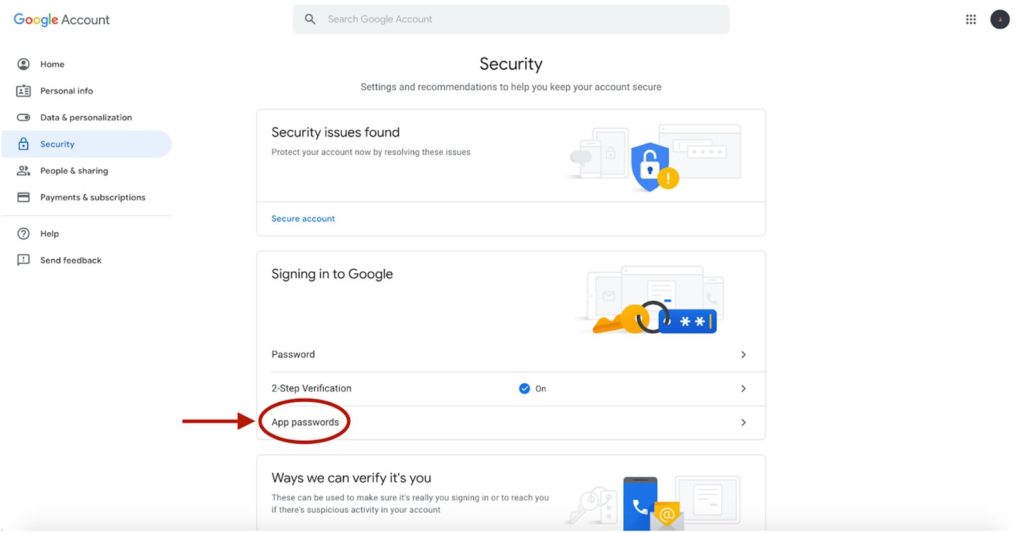
Once you have clicked on the Security tab, you should see the page below. Click on the App Passwords link to generate a password to use when you add the email address. This generated one time password will allow you to bypass the 2FA when adding the new email address.
Step 4:
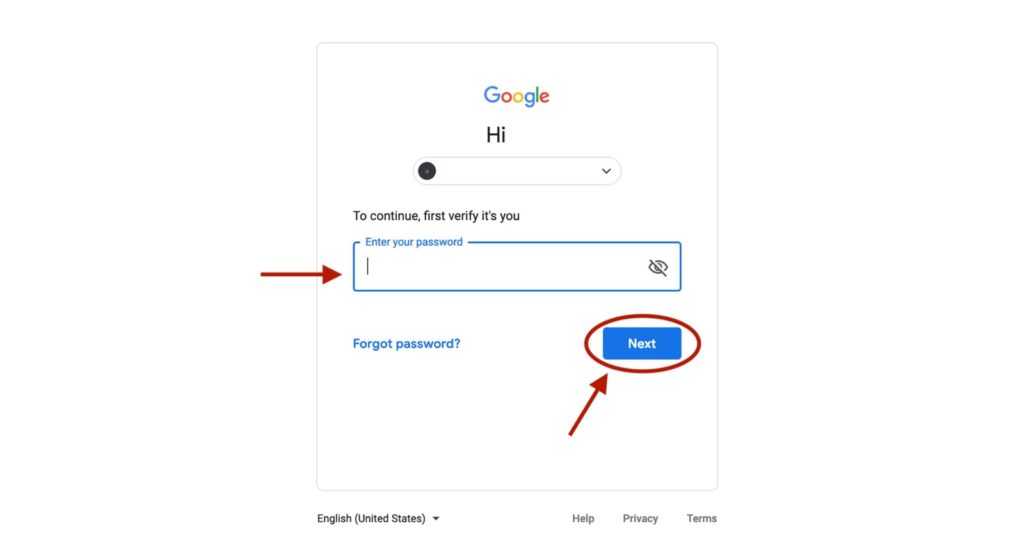
Once you have clicked on the App Passwords link, you should see the page below. Sign in with your regular password that you use to login to Gmail.
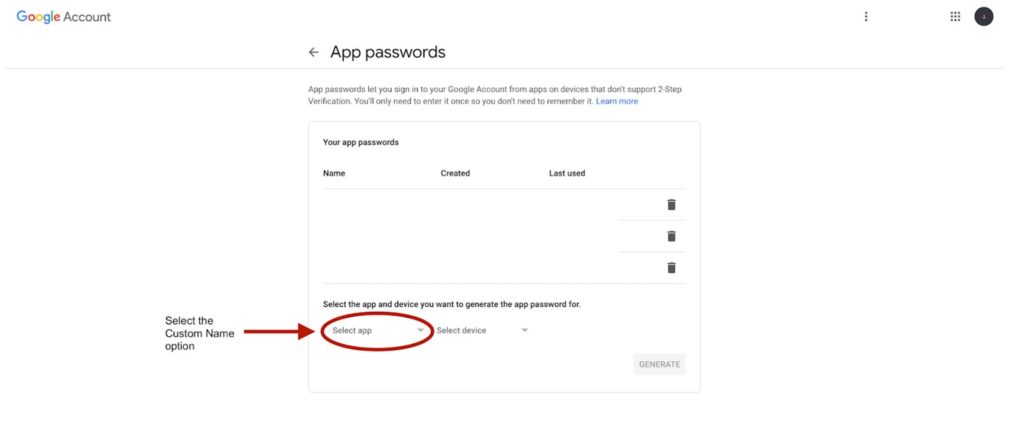
Step 5:
After signing in you should see the page below. Click the dropdown and choose the option to enter a Custom Name.
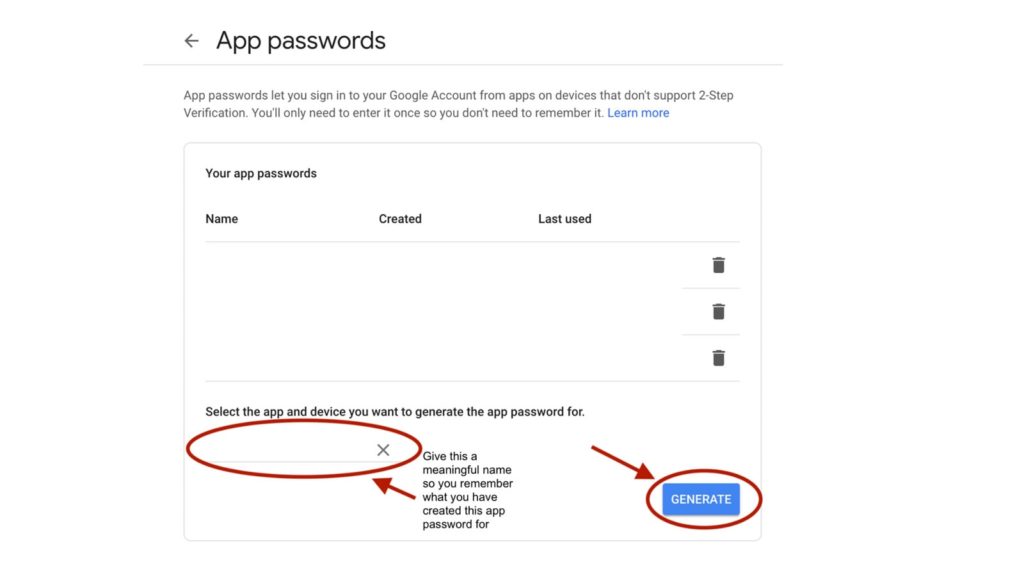
Step 6:
Now enter a name for this one time auto generated password. Pick a name that will be meaningful for the email you are adding. Then click Generate.
Step 7:
After clicking Generate, you will see a popup with your new one time auto generated password. This is the password you will use to bypass the 2FA when you set up the new email address in the steps below. Go ahead and copy this one time password and keep in mind that this password will NOT be visible again after you click away. Click DONE when you have copied the password.

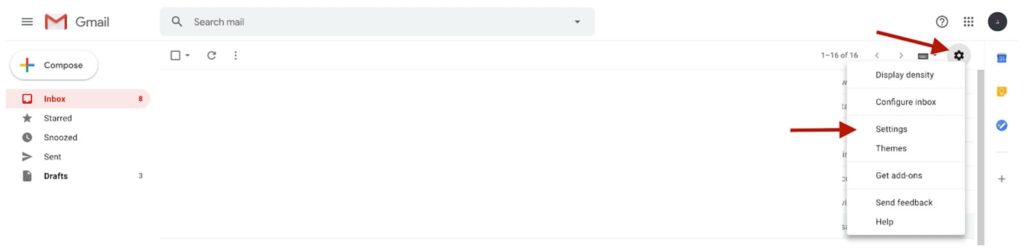
Step 8:
Now head to your Gmail account and login as you normally do. After logged in, click on the gear on the top right and then Settings from the dropdown.
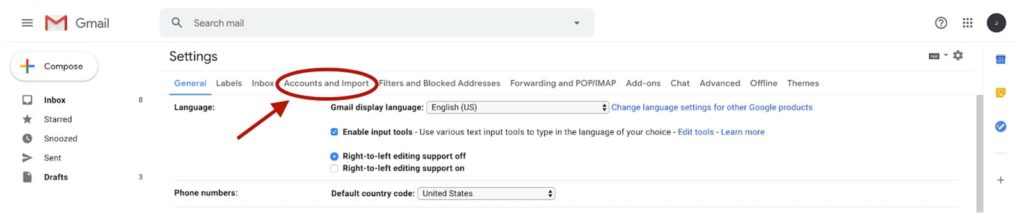
Step 9:
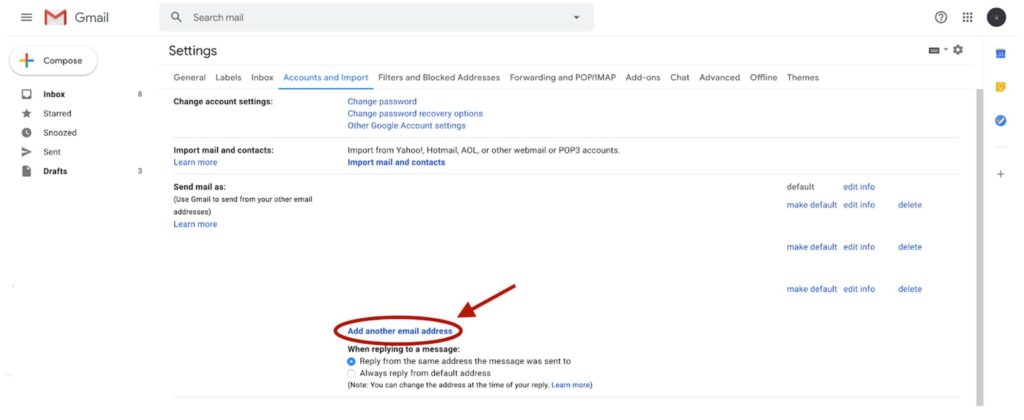
You should now see the page below. Click on the Accounts and Import tab at the top
Step 10:
On this page scroll down and you should see a section labelled Send mail as. Go ahead and click on Add another email address link below.
Step 11:
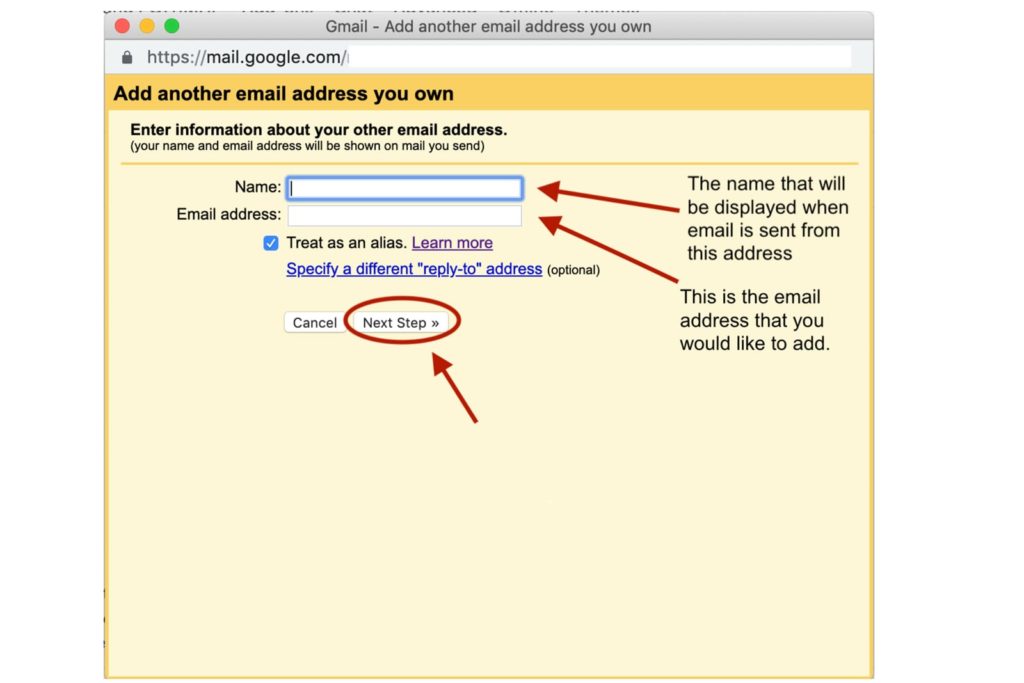
From there you should see a popup like the one below. If you have popups disabled, enable it for this one.
Enter the name that you want to display for the new email address you are adding. KEEP IN MIND this is the name that will be displayed when the user sends emails from this address.
Then enter the new “send from” email address that you want to add to Gmail. REMEMBER the email address you enter in that field should be a valid alias where you can actually receive emails. In the following steps you will need to enter in a verification code received at that email address.
Then click Next Step >>.
Step 12:
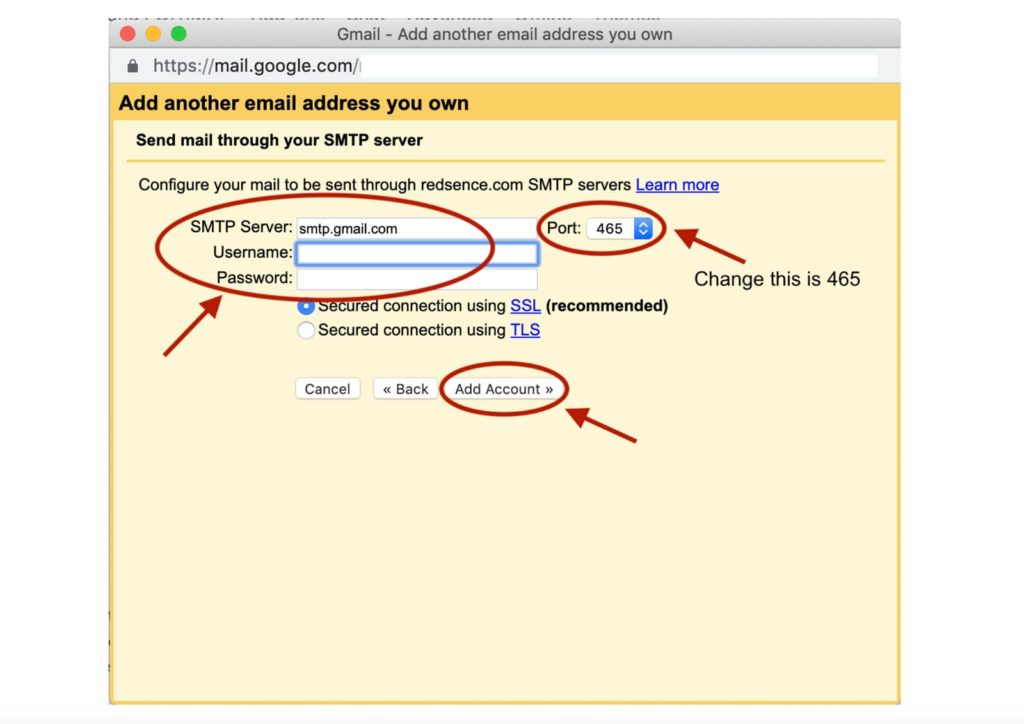
You should now see the page below. Change the SMTP Server to smtp.gmail.com, change the Port to 465. Enter the username for your regular gmail account (with the @gmail.com extension).
- If you started at Step 1 and auto generated a one time password, then PASTE the password below in the Password section.
- If you Skipped to Step 8 and don’t have 2FA enabled, then enter your normal password for your Gmail account.
Click Add Account >>
Step 13:
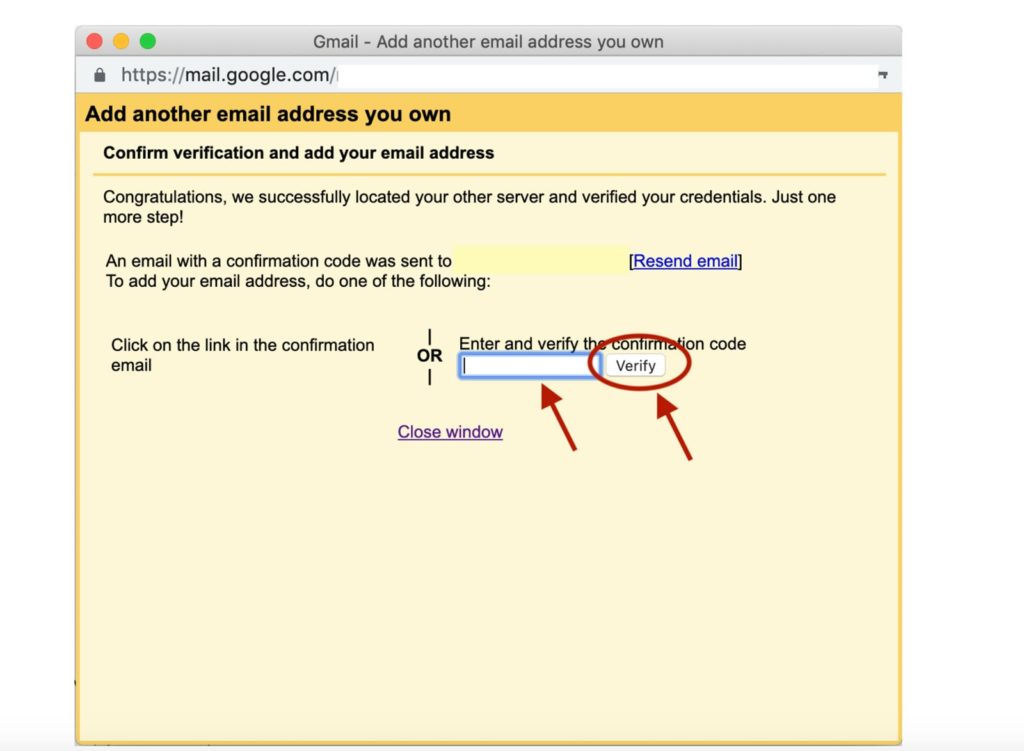
You should now see the page below to enter the verification code. Check your normal email and you should see a verification email from Google.
- Open the email and copy the code you see from the email and paste it in the verification section below. Click Verify. Once you click Verify, the window will close.
- Then open the email you copied the code from, and click on the link to verify the new address. There is a long verification link. Once the page opens, click the button to Verify the new address.
Step 14:
DONE! You should now be able to send emails from your custom business email address with Gmail. To test, click the compose button in mail and select the new address from the dropdown. Write your email as usual and send. HAPPY EMAILING!
Final Tips, Tricks, and Resources
- Many people choose to handle email on their phones nowadays. If you want to send email from the custom email address you just added, the easiest way is by using the Gmail app.